How to troubleshoot ignition problems on a 1970 Plymouth Hemi 'Cuda?
Troubleshooting ignition problems in a classic 1970 Plymouth Hemi 'Cuda can be a critical task to ensure your vintage muscle car runs smoothly. Ignition issues may manifest as the engine not starting…
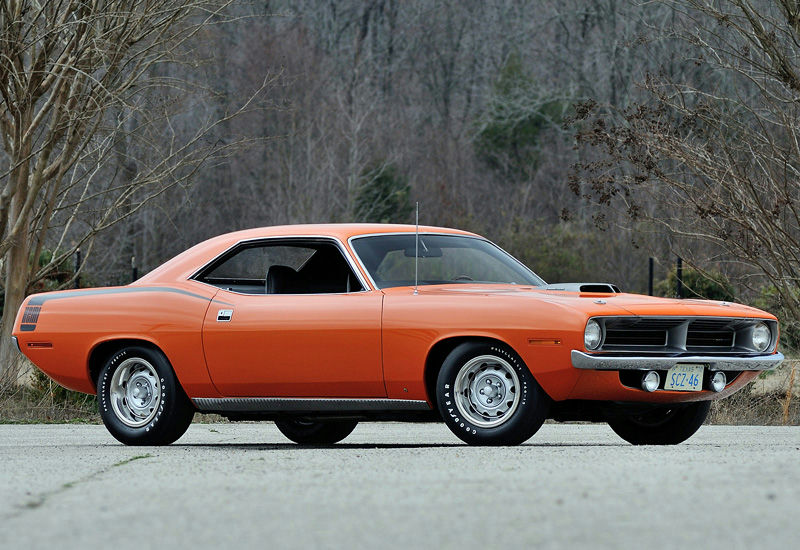
Model: 1970 Plymouth Hemi 'Cuda
Troubleshooting ignition problems in a classic 1970 Plymouth Hemi 'Cuda can be a critical task to ensure your vintage muscle car runs smoothly. Ignition issues may manifest as the engine not starting, misfiring, or running roughly, often leading to performance problems. A thorough troubleshooting process is essential to diagnose and rectify these issues. Here is how to solve this issue:
Join the AutoFame community. Become a member for free, add your car to the garage and tell its story. Join AutoFame.
Step 1: Inspect the Ignition Switch
Begin by checking the ignition switch. This part is located on the steering column. Look for any signs of wear, corrosion, or damage to the wires and connectors. If the ignition switch fails, it won’t send the proper signal to start the engine.
Step 2: Examine the Spark Plugs
Remove the spark plugs from the engine using a spark plug socket. The spark plugs are located on either side of the engine block. Each plug is threaded into a cylinder head and can be accessed easily. Look for signs of fouling or wear. A healthy spark plug has a light tan or grayish color. If plugs are black, oily, or damaged, replace them with new ones, ensuring they are gapped correctly.
Step 3: Check the Ignition Coil
Locate the ignition coil on the engine. In the 1970 Plymouth Hemi 'Cuda, it is typically mounted near the front of the engine. It has a cylindrical shape with wires running from it to the distributor. Test the coil using a multimeter to ensure it is producing the correct voltage. A faulty coil will not provide enough spark to ignite the fuel-air mixture in the cylinders.
Step 4: Inspect the Distributor Cap and Rotor
Remove the distributor cap by unscrewing the holding screws. The distributor is connected via a series of wires and can be found on the side of the engine. Inspect the inside of the cap and the rotor for any signs of cracks, burn marks, or corrosion. Clean any corrosion with a wire brush and replace any parts that show significant wear.
Step 5: Check the Ignition Timing
Using a timing light, check the ignition timing of the engine. Connect the timing light to the number one spark plug wire, which is usually the plug nearest to the front on the driver's side. Point the light at the timing marks on the harmonic balancer (front of the engine) to check if they align with the specifications in the service manual. Adjust the timing as necessary by loosening the distributor hold-down clamp and rotating the distributor slightly.
Step 6: Inspect Wiring and Connections
Go through all the ignition system wiring for any signs of fraying, breaks, or loose connections. Pay special attention to the wires connecting to the ignition coil, distributor, and spark plugs. Also, make sure all ground wires are securely connected and free of rust or paint interference.
Step 7: Test the Battery and Charging System
Have a car with a story like this? Become an AutoFame member and share it with people who love cars as much as you do.
Ensure the battery has a full charge and the charging system is functioning correctly. Check the voltage with a multimeter; a fully charged battery should read around 12.6 volts when the engine is off. Make sure the alternator and voltage regulator are working properly by measuring the voltage with the engine running; it should read between 13.7 and 14.7 volts.
By following these steps, you should be able to diagnose and fix the ignition problems on your 1970 Plymouth Hemi 'Cuda, ensuring your classic car is ready to hit the road with full power and smooth performance.
About AutoFame
AutoFame is a home for people who love cars and the stories behind them. Every car on a show field or in a garage has a history: who built it, who saved it, the road trips, the late nights in the shop and the people who helped along the way. AutoFame gives those stories a place to live, so they are not lost when the hood closes or the car changes hands.
Membership is free. Once you join, you can add your car to your own AutoFame garage with photos, specs and the story only you can tell. Restorations, survivors, daily drivers, race cars and family heirlooms all belong here. Other members can find your car, follow its progress and connect with you over the details that matter to car people.
Beyond member garages, AutoFame publishes stories, guides and features on the cars, builders and history that shape car culture. You will find buying and restoration guides, car parts explainers, special editions, the newest models and the classics that started it all. The AutoFame Gallery puts member cars on display for anyone to browse, and the AutoFame YouTube channel adds owner interviews, show highlights and the conversations that happen around a good car.
AutoFame is also built for the people who run car shows. Organizers use it to manage entries and judging, and judges score each car category by category on their phones, with a written guide for every category so nothing gets skipped. After a judged show, owners can see what their car was scored on and how it compared. Shows across the Texas Gulf Coast have run on AutoFame, including the Moody Gardens Car Show in Galveston, Good Grub and Gears, and Keels and Wheels at Lakewood Yacht Club.
AutoFame was founded by Kevin Brady, whose own life in cars began long before he started building tools for the hobby. The idea is simple: the people who love these cars should have one place to share them, learn from each other and keep the stories going.
Whether you own a show winner, a project that is still in pieces or simply love reading about great cars, there is room for you here.
Be part of the AutoFame community. Join free and become a member today.