How to troubleshoot cooling system issues on a 1970 Plymouth Hemi 'Cuda?
Experiencing cooling system issues in a classic 1970 Plymouth Hemi 'Cuda can lead to overheating and severe engine damage if not promptly addressed. Signs of cooling system problems may include the e…
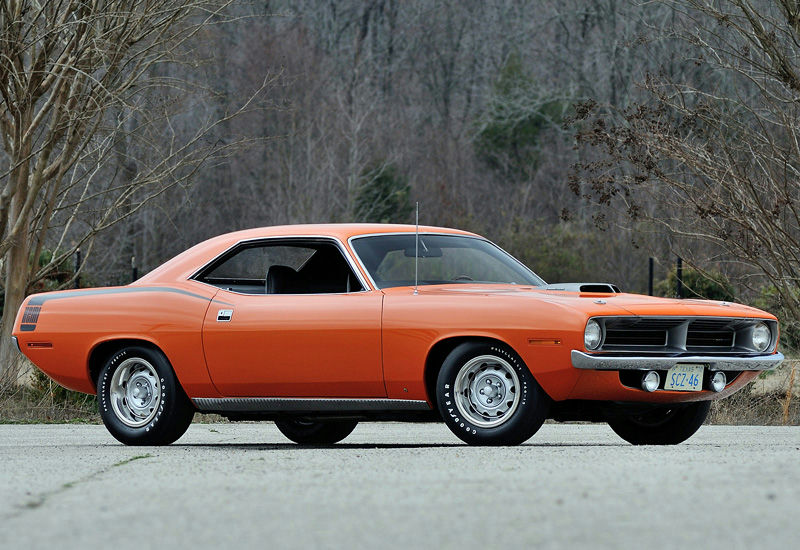
- Model
- 1970 Plymouth Hemi 'Cuda
Experiencing cooling system issues in a classic 1970 Plymouth Hemi 'Cuda can lead to overheating and severe engine damage if not promptly addressed. Signs of cooling system problems may include the engine running hotter than normal, coolant leaks, steam or smoke emanating from the engine bay, or a malfunctioning heater. If you are facing any of these symptoms, it’s essential to diagnose and troubleshoot the issue effectively. Here is how to solve this issue:
Step 1: Check the Coolant Level
The first and simplest step is to check the coolant level.
- Locate the Radiator Cap: Open the hood and find the radiator cap, which is usually on the top center of the radiator and made of metal with a warning label on it. Be sure the engine is cool before opening it to avoid burns from hot coolant.
- Inspect the Coolant Level: Remove the radiator cap and visually inspect the coolant level. It should be up to the base of the filler neck. There is also an overflow tank that is usually a translucent plastic bottle on the side of the engine bay; ensure it's filled to the appropriate level marked on its side.
Step 2: Inspect for Coolant Leaks
Next, check for any signs of coolant leakage.
- Visual Inspection: Look around the radiator, hoses, water pump, and the ground beneath the vehicle for any signs of coolant leaks. Coolant is typically green, orange, or yellow and has a sweet smell.
- Pressure Testing: If no obvious leaks are found, use a cooling system pressure tester to check for leaks under pressure. Attach the tester in place of the radiator cap and pump it up to the radiator's recommended pressure. Watch for any drop in pressure which indicates a leak.
Step 3: Examine the Radiator Hoses
Check the integrity of the radiator hoses for blockages or damage.
- Locate the Hoses: The radiator has two primary hoses – the upper radiator hose connects the radiator to the engine's top, and the lower hose connects the radiator to the water pump.
- Inspect and Squeeze: Check if the hoses are soft, cracked, or swollen. Squeeze them to ascertain if they feel brittle or have collapsed. Replace any damaged hoses.
Step 4: Check the Thermostat
The thermostat regulates the coolant flow through the engine and radiator.
- Locate the Thermostat Housing: It is usually found on the engine block, connected to the upper radiator hose. The housing typically has a domed shape and is attached with bolts.
- Remove and Test the Thermostat: Drain some coolant, then remove the housing to access the thermostat. Place the thermostat in boiling water to see if it opens. If it doesn't open or is stuck, it needs to be replaced.
Step 5: Inspect the Water Pump
A faulty water pump can cause poor coolant circulation.
- Locate the Water Pump: The water pump is usually mounted on the front of the engine and connected with a pulley and belt system.
- Check for Leaks and Noise: Look for any signs of coolant leaks around the water pump or listen for a whining noise. Try to move the pump pulley; it should not have any play. If it's leaking or making noise, replace the pump.
Step 6: Verify the Radiator Condition
Assessing the radiator’s condition is crucial for proper cooling.
- Visual Inspection: Look for any external damage or blockage of the radiator fins, which are metal and usually visible through the front grill.
- Check for Internal Blockages: Drain the coolant and remove the radiator. Flush it with water or use a radiator cleaning solution to ensure there are no internal blockages. If the radiator is clogged or heavily corroded, consider replacing it.
Step 7: Examine the Fan and Fan Clutch
- Locate the Engine Fan: Typically found attached to the water pump or the front of the engine and encased in a fan shroud.
- Check Fan Operation: With the engine off, spin the fan manually; it should have slight resistance. If the fan spins freely with little resistance or wobbles, the fan clutch or the fan itself may need replacement.
By carefully performing these steps, you can troubleshoot and resolve cooling system issues to keep your 1970 Plymouth Hemi 'Cuda running smoothly. Regular maintenance and timely repairs are key to preserving the health and performance of this classic muscle car.